gui walkthrough
This is what the installer looks like, screen by screen. Every image on this
page is generated in CI from the real SwiftUI views by
ScreenshotCaptureTests (see .github/workflows/bootsahi-app-build.yml), so
it cannot drift from the app the way hand-taken screenshots do.
What these images are and are not. They are captured from the real SwiftUI
views hosted in an offscreen NSWindow, so the controls you see — buttons,
fields, lists, sliders — are the genuine AppKit controls the app uses. What is
absent is window chrome: no title bar, and no vibrancy behind the bottom bar,
because the capture covers the window's content view rather than the window.
Two further caveats, both honest limits rather than bugs. The images are 1x (860x640) — the capture follows the CI runner's backing scale, which is not Retina. And controls may render in their inactive appearance, so an enabled primary button can look paler here than on your Mac.
Before you start
- An Apple Silicon Mac (M1 or M2). M3 and later are not supported by Asahi yet.
- macOS 13 or later, and an administrator account.
- Free space to give Linux. The installer will show you the split.
- A backup. This repartitions the disk your Mac is running from. It is designed not to touch macOS, and you should still have a backup.
1. What you are about to do
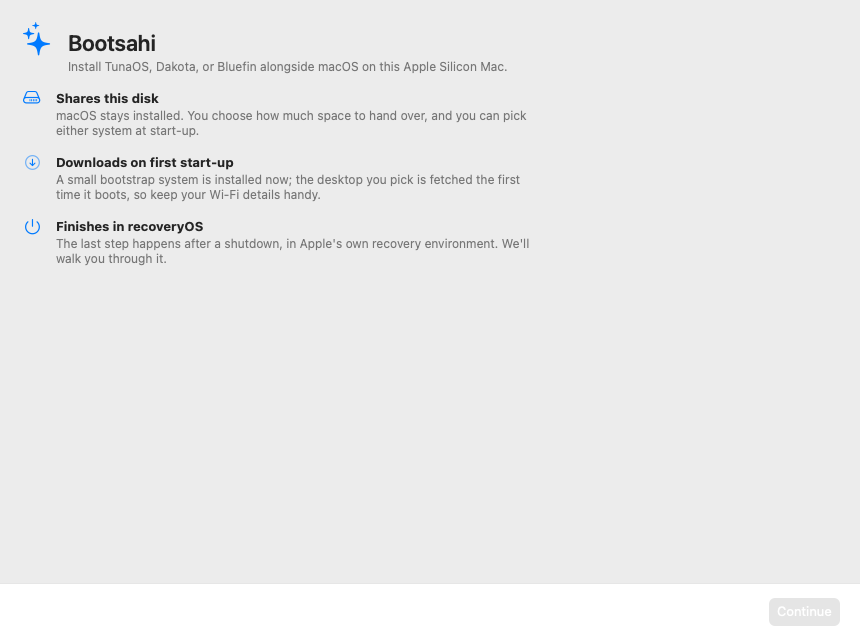
The first screen states the shape of the job before anything is touched: macOS stays installed, the desktop you choose is downloaded on first start-up rather than now, and the final step happens in Apple's recovery environment after a shutdown.
2. Choose what to install
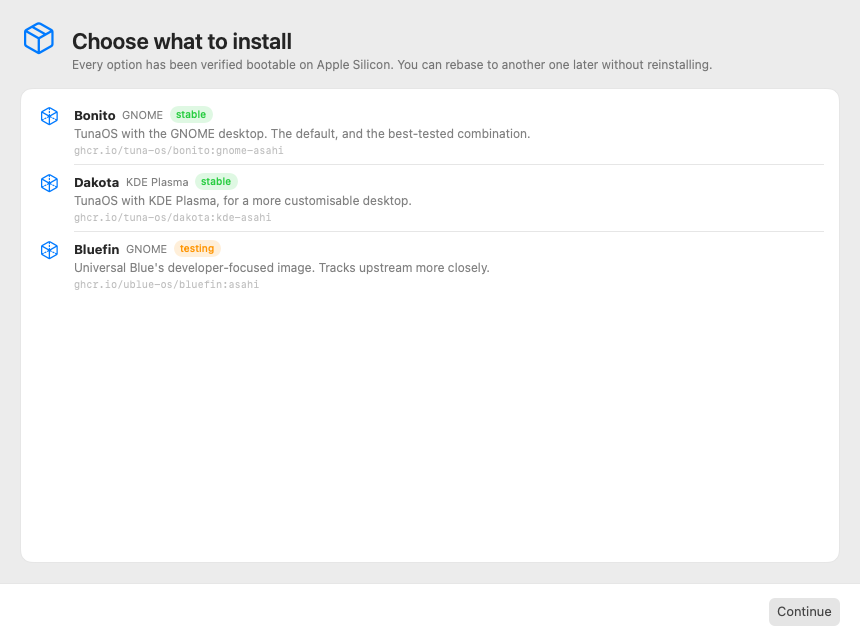
Each entry is a bootc image. The stable badge means the combination is
tested; testing tracks upstream more closely and moves faster. The image
reference underneath is the exact thing that gets installed — it is worth
copying into any bug report.
You are not locked in. A bootc system can rebase to another image later without reinstalling.
3. Set up your account
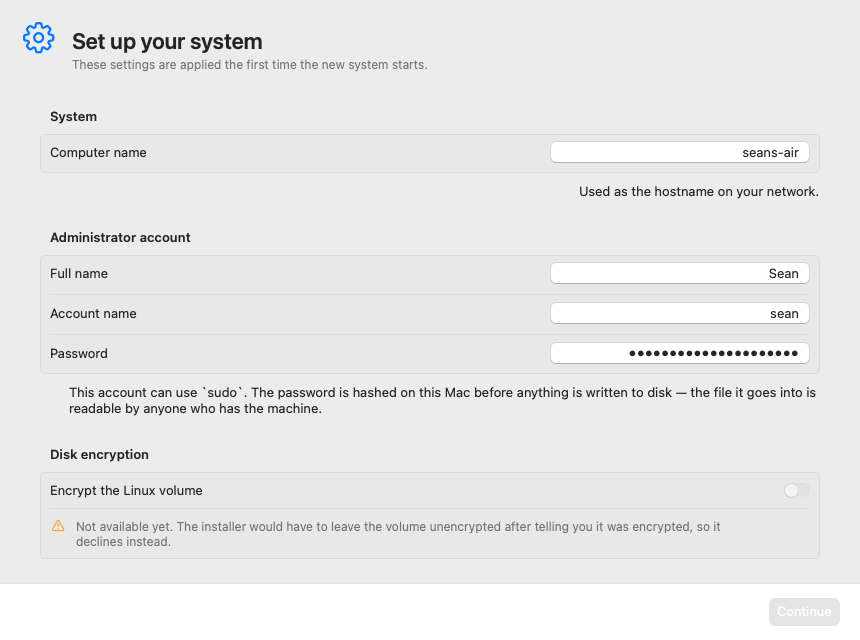
The computer name becomes the hostname. The account you create here is an administrator on the new system.
Two things on this screen are deliberately limited, and both are security decisions rather than missing work:
- Disk encryption is disabled. The install path in use does not apply LUKS, so offering the toggle would produce a system that reported itself encrypted and was not. See issue #20.
- Wi-Fi asks for the network name only. The password is requested on the Mac itself at first start-up in Linux, and is never written to disk by the installer. The config file lives on the EFI system partition, which is unencrypted and world-readable, so a password stored there would be readable by anyone with the machine. See issue #21.
4. Decide the split
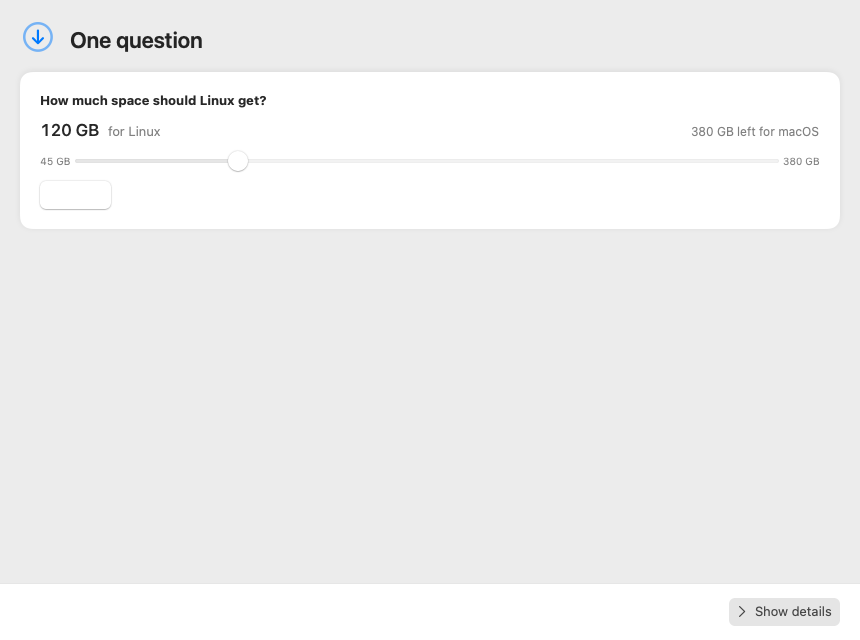
This is the only irreversible-feeling step, and the numbers are real byte counts reported by the installer backend — both sides of the split are shown so you can see what macOS keeps.
Linux needs roughly 45 GB at minimum for a desktop image with room to update. The macOS side needs headroom too; leaving it under about 30 GB free will make macOS unhappy in ways unrelated to this installer.
5. Installation
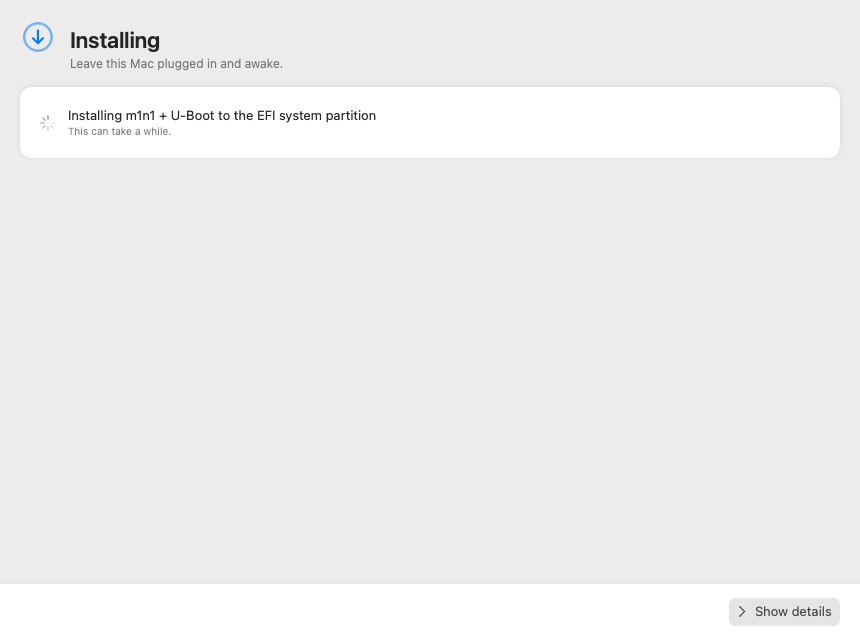
The bootstrap system is written to the new partitions, and m1n1 plus U-Boot are installed so the Mac can boot something other than macOS.
Show details reveals the full backend log. Each line is marked with a symbol as well as a colour, so warnings and errors are distinguishable without relying on colour perception. If you are filing a bug, this pane is selectable and copyable.
Leave the Mac plugged in and awake.
6. Finish in recoveryOS
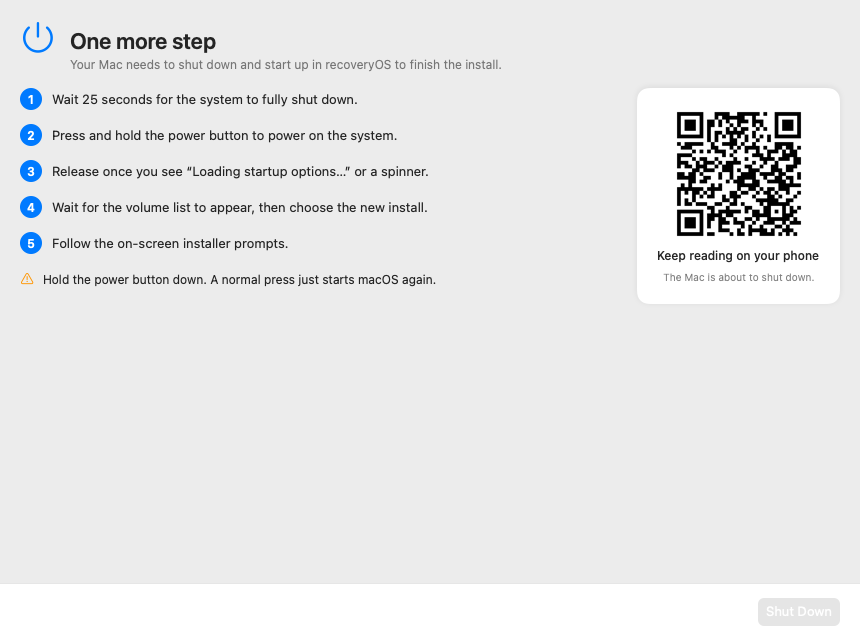
This is the step no installer can do for you, and the one where first-time Asahi users most often get stuck.
After the Mac shuts down you must press and hold the power button — a normal press just starts macOS again. Keep holding until "Loading startup options…" appears, then choose the new install from the volume list and follow the prompts.
The QR code on this screen points at the online version of these instructions. Scan it before you shut down: the Mac's screen is about to go dark, and the instructions you need are the ones you can still read.
7. First start-up in Linux
The first boot does the rest by itself: it downloads the desktop image you chose, verifies its signature, deploys it, and creates your account.
You will be asked, on the machine, for:
- the Wi-Fi password, if you gave a network name;
- nothing else — there is no other secret the installer defers.
Both prompts come from systemd-ask-password before the login screen appears.
If something goes wrong
The installer is built to fail before it destroys anything rather than after. If it stops with an error:
- The failure reason on the final screen is selectable — copy it.
install-config.jsonis deliberately kept on the EFI system partition after a failure so the run can be retried and diagnosed. It contains no passwords, by design.- Open an issue with the reason string and, if you have it, the log from the Show details pane.